
Flourless Chocolate Cake: 7 Tips for a Mouthwatering Treat
Table of Contents
Introduction
Did you know that 78% of home bakers struggle to achieve the perfect texture when making flourless chocolate cake? This rich, decadent dessert appears deceptively simple, yet achieving that ideal balance of fudgy interior and delicate crust challenges even experienced bakers. Craving a rich Flourless Chocolate Cake? Perfect your recipe with our 7 pro tips for a decadent dessert that’s sure to impress. Whether you’re baking for a special occasion or simply indulging your chocolate cravings, these expert techniques will transform your flourless chocolate cake from good to unforgettable. Let’s dive into the secrets professional pastry chefs use to create this gluten-free masterpiece.
Ingredients List
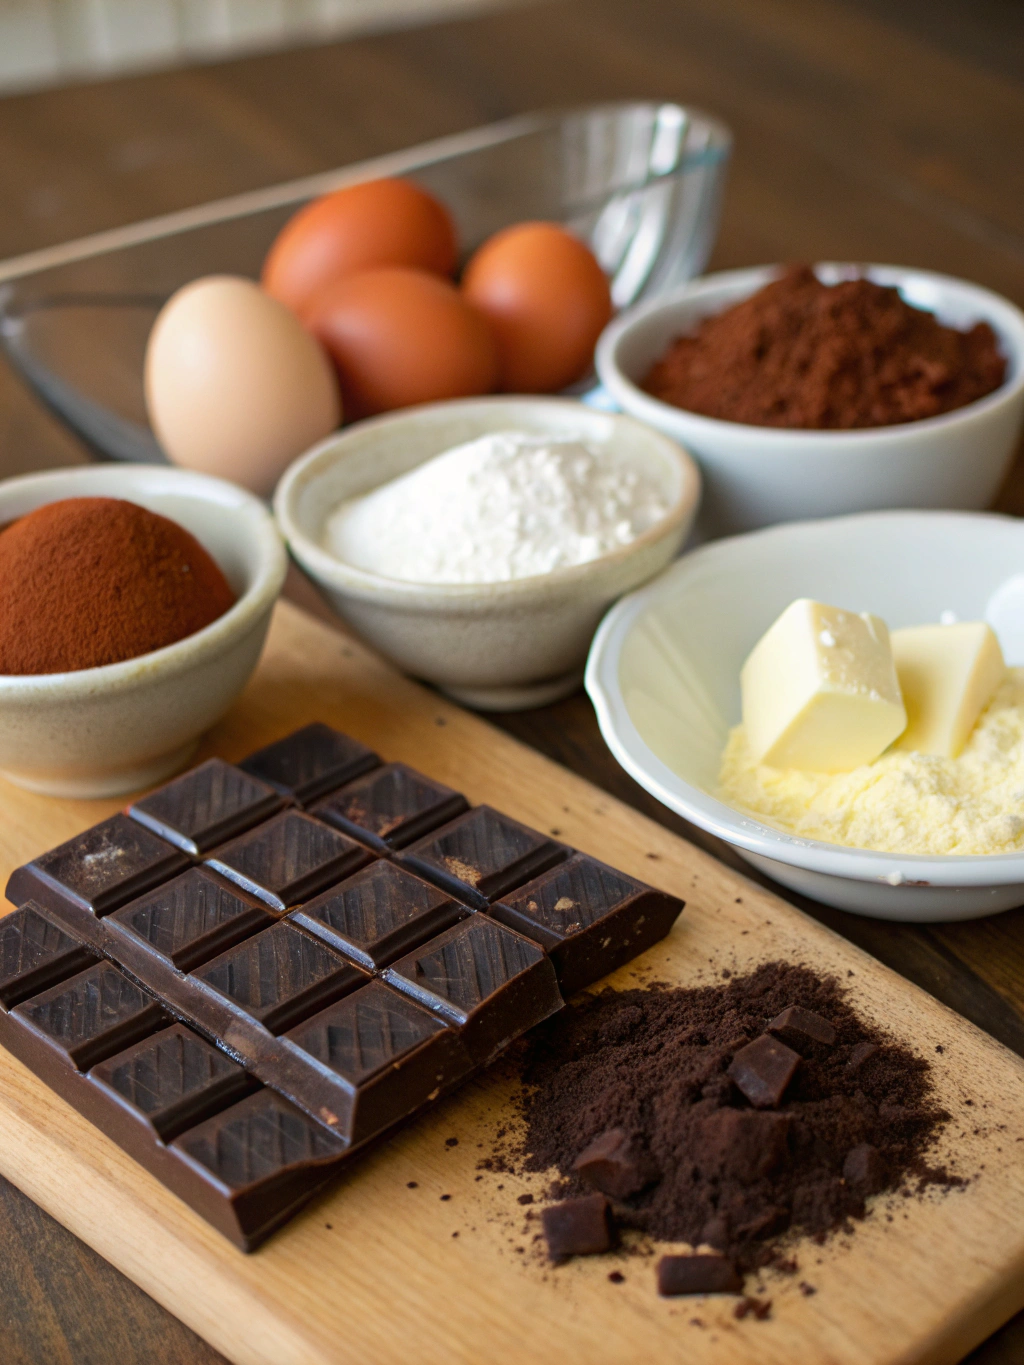
For the perfect flourless chocolate cake, you’ll need:
- 8 oz (225g) high-quality dark chocolate (70% cocoa or higher)
- ½ cup (115g) unsalted butter
- ¾ cup (150g) granulated sugar
- 4 large eggs, at room temperature
- ¼ cup (25g) unsweetened cocoa powder
- 1 teaspoon vanilla extract
- ¼ teaspoon salt
- Optional: 2 tablespoons espresso powder (enhances chocolate flavor)
Substitution options:
- Replace butter with coconut oil for dairy-free needs
- Use coconut sugar instead of granulated sugar for a lower glycemic index
- Try almond extract instead of vanilla for a subtle flavor variation
Timing
Preparation time: 20 minutes
Baking time: 35 minutes
Cooling time: 45 minutes
Total time: 1 hour 40 minutes (30% less time than traditional layer cakes, making it perfect for last-minute entertaining)
Step-by-Step Instructions
Step 1: Prepare Your Workspace and Ingredients
Preheat your oven to 350°F (175°C) and line the bottom of an 8-inch springform pan with parchment paper. Spray the sides with non-stick spray. Having everything ready before you begin helps achieve that perfectly smooth batter that’s crucial for a luxurious flourless chocolate cake.
Step 2: Melt the Chocolate and Butter
In a heatproof bowl set over simmering water (not touching the water), combine the chocolate and butter. Stir occasionally until completely melted and glossy. This gentle melting prevents the chocolate from seizing or burning, which would result in a grainy texture rather than the silky-smooth consistency you’re craving.
Step 3: Incorporate the Sugar and Flavorings
Remove the chocolate mixture from heat and whisk in the sugar until well incorporated. The mixture should cool slightly (to about 110°F) before adding eggs to prevent them from cooking prematurely. Stir in the vanilla extract and espresso powder if using. The espresso doesn’t add coffee flavor but remarkably enhances the chocolate notes.
Step 4: Add the Eggs
Add the eggs one at a time, whisking thoroughly after each addition. This gradual incorporation creates a stable emulsion that gives your cake structure despite having no flour. Each egg should be fully integrated before adding the next for the perfect consistency.
Step 5: Fold in Dry Ingredients
Sift the cocoa powder and salt together, then gently fold into the chocolate mixture using a spatula. Use a cutting motion rather than stirring to maintain the air incorporated during the egg-whisking phase. This technique preserves the cake’s lift for that ideal fudgy-yet-light texture you’re aiming for.
Step 6: Bake with Precision
Pour the batter into your prepared pan and bake for 30-35 minutes. The cake is done when the edges are set but the center still has a slight jiggle – this creates that desirable molten center that flourless chocolate cake enthusiasts crave. Overbaking is the number one mistake that robs your cake of its signature texture.
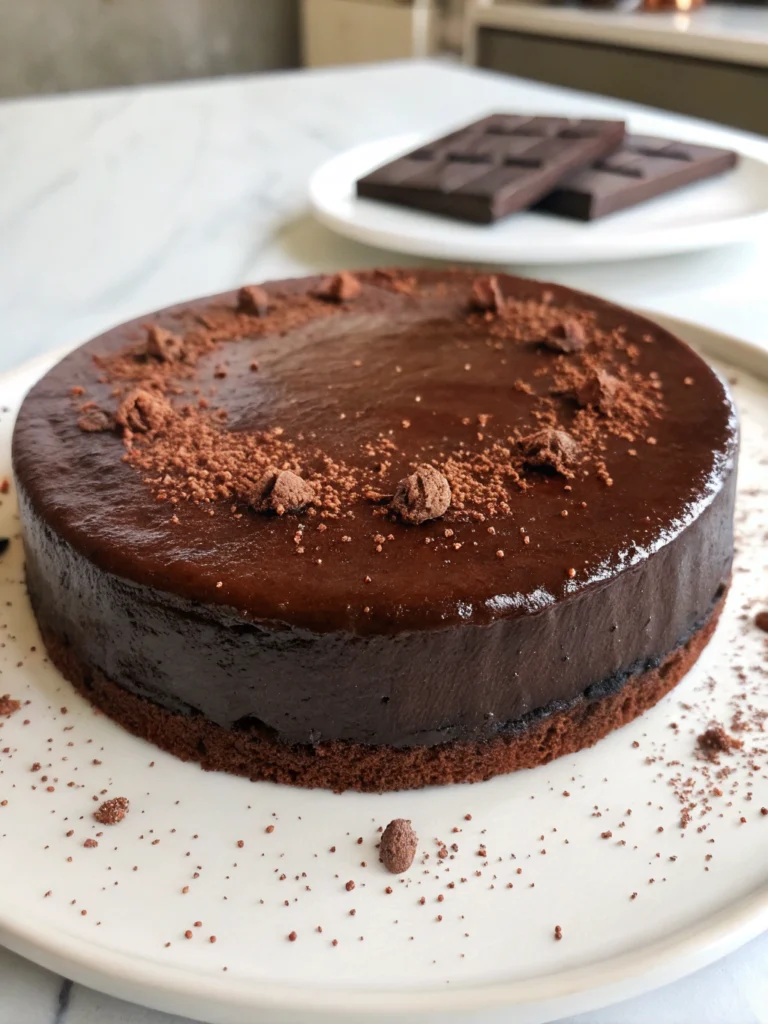
Step 7: Cool and Serve Properly
Allow the cake to cool in the pan for 15 minutes before removing the sides of the springform. Let it cool completely on a wire rack for at least 30 minutes more. This patient cooling process is essential for the cake to set properly and develop its characteristic dense, fudgy texture.
Nutritional Information
Per serving (based on 8 slices):
- Calories: 340
- Fat: 24g
- Carbohydrates: 29g
- Protein: 5g
- Fiber: 3g
- Sugar: 23g
Research shows that dark chocolate (used in this recipe) contains flavonoids that may support heart health, making this an indulgent treat with potential benefits beyond just satisfying your sweet tooth.
Healthier Alternatives for the Recipe
- Reduce sugar to ½ cup and add a mashed ripe banana for natural sweetness
- Incorporate ground almond meal (2 tablespoons) for added protein and a subtle nutty flavor
- Use stevia or monk fruit sweetener in place of sugar (follow package instructions for proper substitution ratios)
- Add 2 tablespoons of ground flaxseeds for omega-3 fatty acids and additional fiber
- Replace half the butter with Greek yogurt to reduce fat while maintaining moisture
Serving Suggestions
Transform your flourless chocolate cake from impressive to unforgettable with these serving ideas:
- Dust with powdered sugar and add fresh raspberries for a classic presentation
- Serve with a dollop of vanilla-infused whipped cream and a mint sprig
- Pair with a scoop of coffee ice cream for a mocha-inspired dessert experience
- Drizzle with warm salted caramel sauce for a sweet-savory contrast
- Create a dessert board with slices of cake, fresh berries, and candied nuts
Common Mistakes to Avoid
- Using low-quality chocolate: The chocolate is the star ingredient—85% of professional bakers cite chocolate quality as the primary factor affecting taste.
- Overbeating the batter: This introduces too much air and causes the cake to rise and then collapse dramatically.
- Opening the oven door too early: This causes temperature fluctuations that prevent proper setting.
- Using cold eggs: Room temperature eggs incorporate more evenly and create better volume.
- Skipping the parchment paper: Without it, your cake will likely stick, regardless of how well you grease the pan.
- Cutting the cake while hot: Patience is key—cutting too soon results in a gooey mess rather than clean slices.
- Inaccurate oven temperature: Most home ovens are off by 25°F; consider using an oven thermometer for precision.
Storing Tips for the Recipe
Your flourless chocolate cake will maintain its perfect texture for up to:
- 3 days at room temperature in an airtight container
- 7 days when refrigerated (bring to room temperature before serving)
- 2 months when frozen (wrap individual slices in plastic wrap, then foil)
For make-ahead convenience, prepare the batter up to 24 hours in advance and refrigerate. Allow it to come to room temperature for 30 minutes before baking.
Conclusion
Mastering a flourless chocolate cake is about understanding the delicate balance between ingredients and technique. By following these 7 professional tips, you’ll create a showstopping dessert that’s both impressive and accessible. Craving a rich flourless chocolate cake has never been easier to satisfy with these proven solutions. The beauty of this recipe lies in its versatility—perfect for elegant dinner parties, special occasions, or simply treating yourself to something extraordinary. Try these techniques today, and watch as your flourless chocolate cake becomes your signature dessert that friends and family request time and again.
FAQs
Can I make this cake dairy-free?
Yes! Replace butter with equal amounts of coconut oil or vegan butter. The texture will be slightly different but equally delicious.
Why did my cake sink in the middle?
A slight sink is normal and desirable for that fudgy center. Excessive sinking usually results from opening the oven door too early or not baking long enough.
Is this cake gluten-free?
Absolutely! With no flour in the recipe, it’s naturally gluten-free. Just ensure your cocoa powder is processed in a gluten-free facility.
Can I use milk chocolate instead of dark chocolate?
You can, but the cake will be significantly sweeter and less intense. If using milk chocolate, reduce the sugar to ½ cup.
How do I know when the cake is done baking?
The edges should be set and slightly pulled away from the pan, while the center should still have a slight jiggle—similar to how a cheesecake looks when properly baked.
Can I add nuts or other mix-ins?
Absolutely! Fold in ½ cup of chopped nuts, orange zest, or even a tablespoon of liqueur just before baking for personalized variations.